Scenario:
How to setup outbound SMTP on a Android Phone?
Solution:
In the example below we are using a HTC phone running Android to use MX Outbound as the outgoing SMTP Server. Although screenshots will be slightly different for other devices this step-by-step process is similar.
This article guides you from adding an email account from scratch, so the screens will be slightly different if you are amending an exisiting account. It is assumed your device is connected to your mobile phone network and is data enabled.
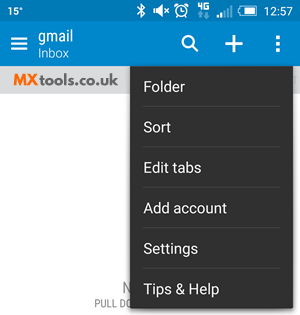
Run the Mail Application and choose the "Add Account" option from the drop down menu.
Select POP3/IMAP Account

Enter the inbound IMAP/POP3 details as provided by your email provider and then tap next. This will verify your inbound settings by attempting a connection to the inbound server. If all is ok, then proceed to the next section

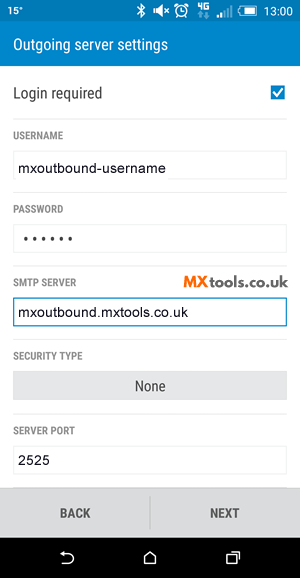
Outbound settings.
Ensure the tick box is selected for "Login required".
Enter the server details, username and password we've issued to you.
Ensure the security type is "None" and set the "Server Port" to 25 (or use an alternative smtp port if the default is filtered or blocked by your network provider) and then tap next.
As with the inbound settings this will now verify your settings by attempting to connect to the outbound server.
If all is ok, then proceed to the next section and finish the setup.

Summary of server details
|
Outgoing server |
As provided. |
|
Outgoing server protocol |
SMTP |
|
Outgoing server port |
25, 465, 587, 2525, 8025 or 10025 |
|
Authentication Type |
Basic Authentication |
|
Username |
As provided |
|
Password |
As provided |