Scenario:
How to setup a SmartHost in Exchange 2003?
How to setup Exchange 2003 to use MX Outbound as a Mail Relay?
Solution:
Follow the guide below to configure Microsoft Exchange 2003 use MX Outbound as the SmartHost and Internet Mail Relay.
This article already assumes your exchange system is able to send emails externally and therefore a SMTP Connector and SMTP Virtual Server has already been created and configured correctly in the System Manager for Exchange.
Open Exchange Management Console also known as System Manager for Exchange
Click on the + next to Servers
Click on the + next to Organization
Click on the + next to Protocols
Click on the + next to SMTP
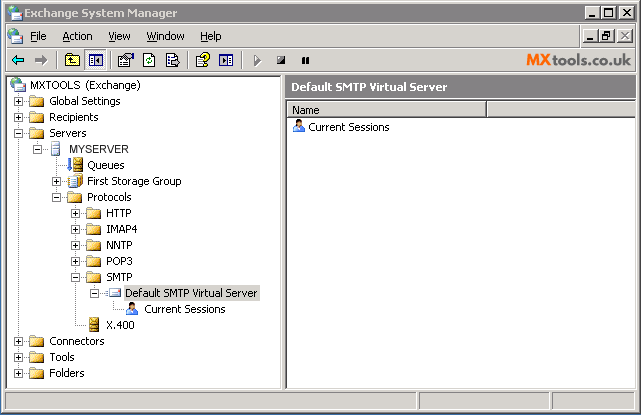
Right click on your Default SMTP Virtual Server
Click properties
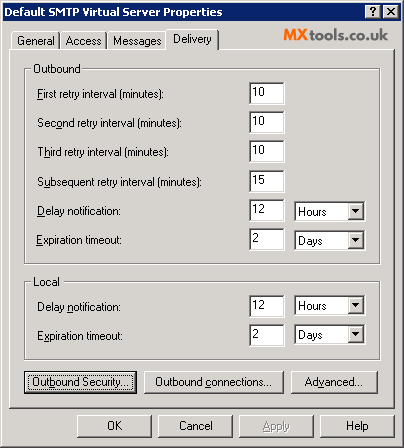
Under Delivery click Outbound Security
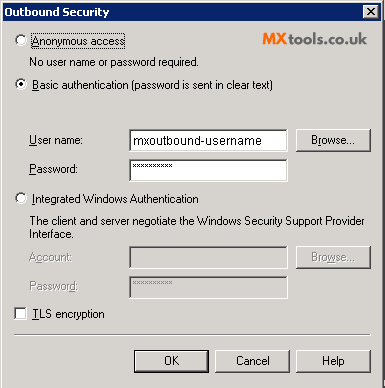
Enter the username and password provided to you and click OK.
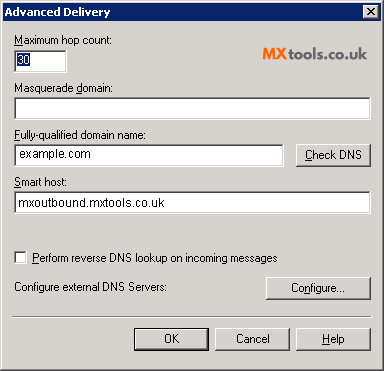
Click on the Advanced button and ensure your fully qualified domain name is correct. In this knowledge base article we are using example.com.
Enter MX Outbound server as provided to you in the "Smart host" field and click OK
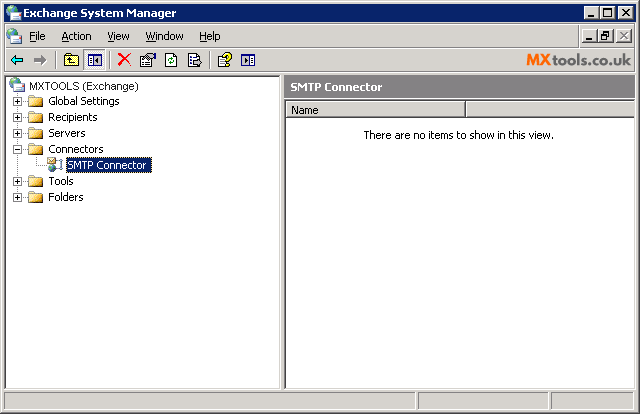
Scroll down to the Connectors folder and click the + to expand it.
Note: If you can not find the Connectors folder then select the Routing Groups folder and expand the tree until you do find the Connectors folder.
Expand and right click the Internet Mail Connector
Click on Properties.
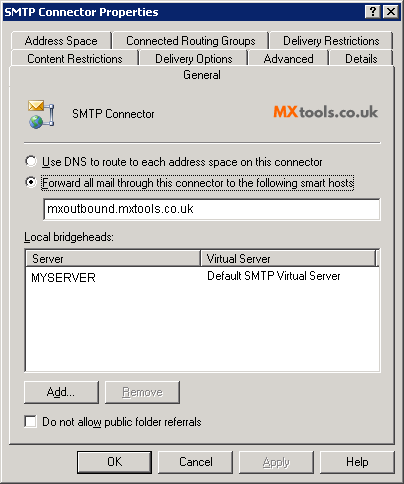
Select "Forward all mail through this connector to the following smart hosts"
Enter the MX Outbound server as provided to you in the field.
Note: If your server isn't already in the list of local bridgeheads you will need to add it.
Select the "Advanced" TAB.
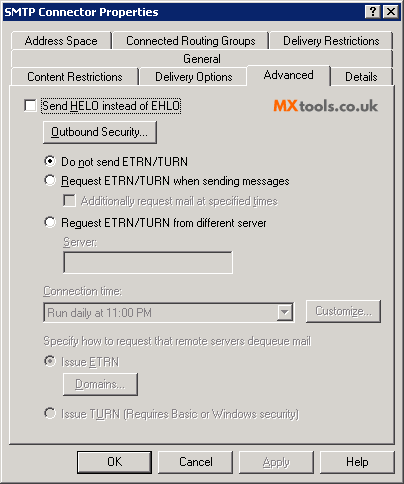
Select "Do not send ETRN/TURN"
Click on the "Outbound Security..." Button
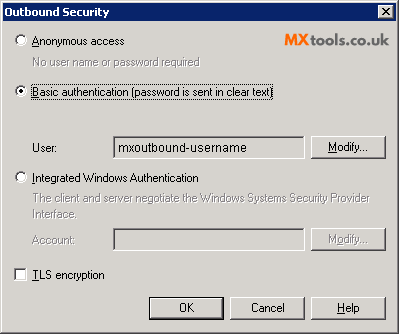
Select "Basic authentication"
Click on the Modify button.
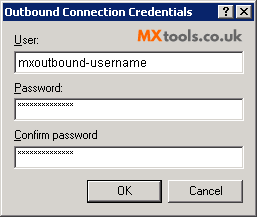
Enter the username and password provided to you and click OK.
Continue clicking on OK until you return to the System Manager.
Although not necessary you may need to restart the Virtual SMTP Server for the settings to take effect
Video Tutorial
Summary of server details
|
Outgoing server |
As provided. |
|
Outgoing server protocol |
SMTP |
|
Outgoing server port |
25, 465, 587, 2525, 8025 or 10025 |
|
Authentication Type |
Basic Authentication |
|
Username |
As provided |
|
Password |
As provided |